How to Make a Deep Sea Viral Video from One Photo
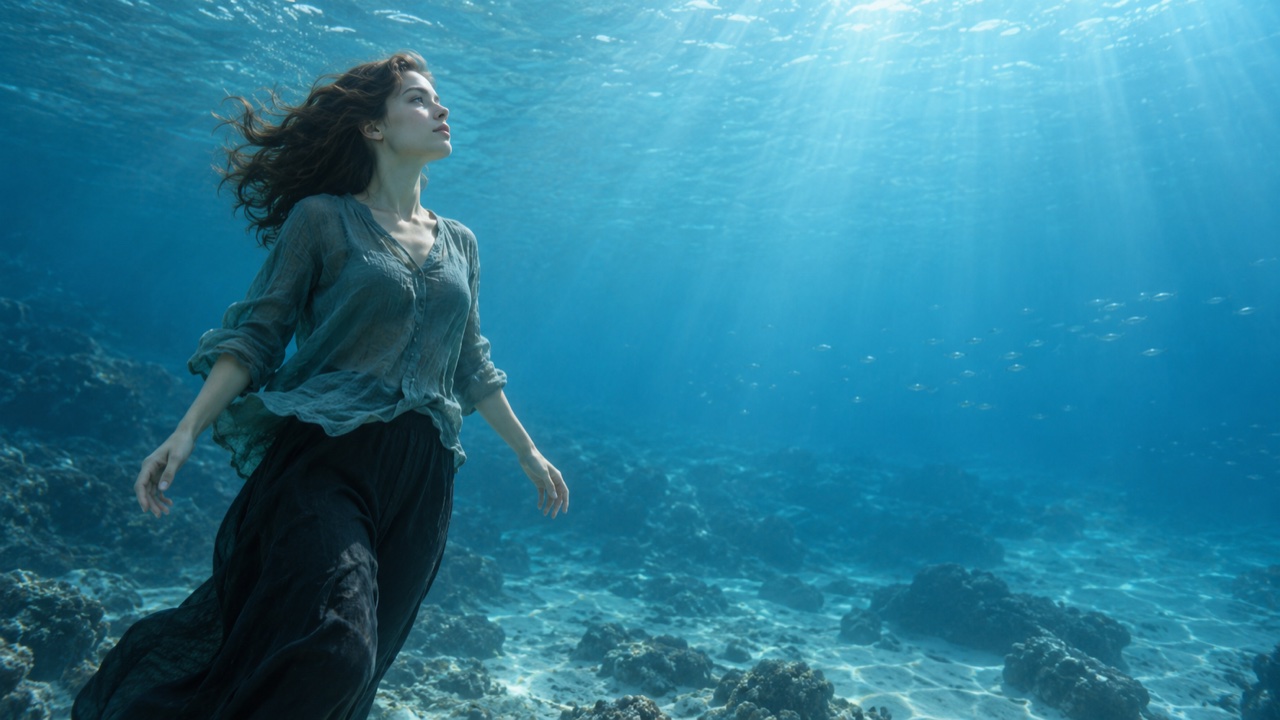
Turn an Everyday Portrait into a Dreamlike Underwater Clip. Follow the SuperMaker Setup with an Annotated Interface Screenshot, Choose a Suitable Photo, Set the Frame and Duration, and Check Faces, Hands, and Motion before Downloading Your Video for a Short Social Edit.
A deep sea viral video turns an ordinary portrait into a surreal underwater scene: the person floats, clothing drifts, and light filters through blue water. To make one, start with a clear photo, upload it to an underwater video effect, choose your frame and duration, then review the movement before downloading.
This guide walks through the SuperMaker interface and suggests a simple first setup. “Viral” describes the style, not a promise of views. The practical goal is a short clip with a recognizable subject and believable, gentle movement.
What Makes the Deep Sea Look Work?
The strongest version has one clear focal point. A face or silhouette catches your attention first; fabric, hair, and light provide the movement around it. Too many competing details can make the scene harder to read on a phone.
Think about one visual idea before choosing your photo: a quiet floating portrait, a loose shirt moving through blue water, or a figure surrounded by distant fish. You do not need all three. A restrained scene gives you a clearer result to judge.
Step 1: Choose a Clear Source Photo
Use a single-person photo with a visible face and a simple outline. Soft daylight usually makes facial features easier to see than harsh shadows or colored party lighting. Leave space around the head and shoulders, especially if you want a wider underwater composition.
For a first attempt, look for:
- Unobscured eyes and a complete hair outline.
- Hands fully inside the frame, if they appear at all.
- Clothing that separates clearly from the background.
- A relaxed pose with few overlapping limbs.
- Enough room around the body for your intended crop.

Illustrative source-photo example created for this guide. It was not the input for the video example below.
A plain shirt, loose blouse, or flowing dress can each suggest a different mood. Choose clothing that suits your idea; a white dress is not a requirement. Use a photo you own or have permission to animate.
Step 2: Upload Your Photo to the Effect
Open the SuperMaker Deep Sea Viral Video effect and scroll to the creation panel beneath the banner. Sign in if prompted.
Under Upload Reference, select Upload files and choose your photo. The panel also offers Assets Library if your image is already stored there. This effect uses one reference image, so start with one clear portrait rather than a collage.
The dedicated effect supplies its underwater direction. You do not need to write a long prompt to follow this workflow. Check that you selected the intended file before moving on to the settings.
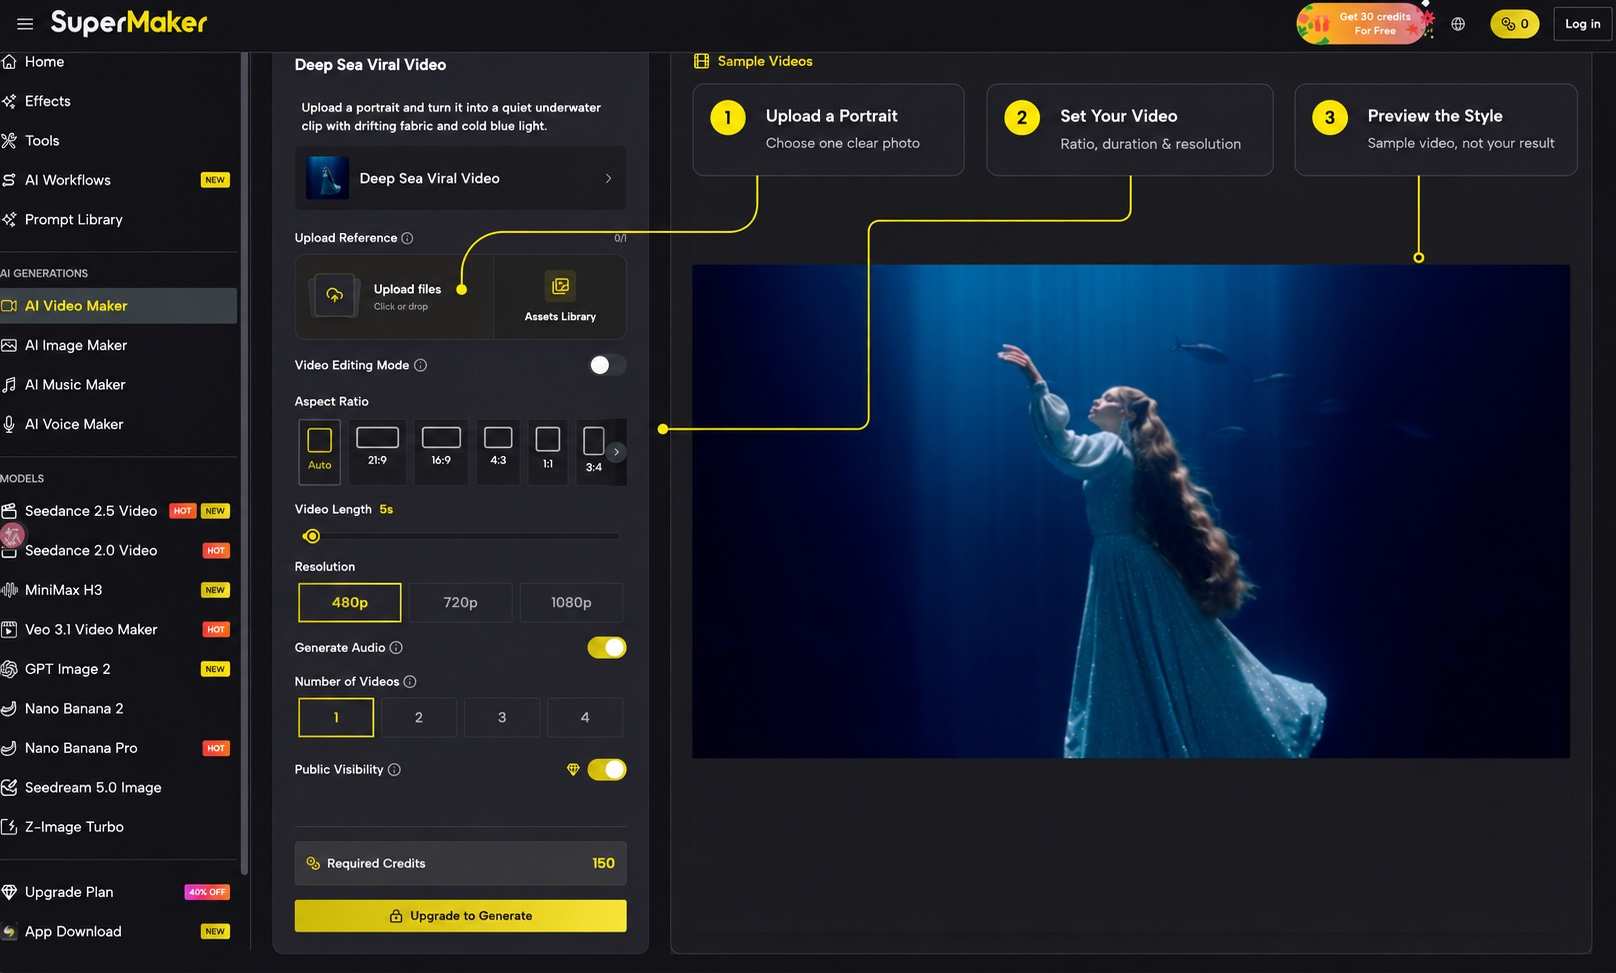
User-provided SuperMaker screenshot with tutorial annotations: 1, upload a portrait; 2, choose video settings; 3, preview the sample style. The right-hand video is a preset example, not a newly generated result. Source: SuperMaker effect page.
Step 3: Set the Frame and Duration
Choose the format for where the video will appear. 9:16 is a useful starting point for a full-screen vertical post. 16:9 suits a landscape presentation or website placement. The ratio row scrolls horizontally, so move along it if your preferred option is off-screen.
Start with 5 seconds and one video. This gives you a short first attempt to evaluate before creating additional variations. A longer clip is not automatically a better clip, especially when the intended motion is subtle.
Use callout 2 in the screenshot to locate the settings. Check the available resolution options and the displayed Required Credits estimate. The amount shown in the screenshot is an example from that setup, not a fixed price for every configuration. Review Public Visibility too, so the selected sharing setting matches your intention.
Step 4: Generate and Review the Movement
The screenshot shows a logged-out view with Upgrade to Generate at the bottom. Sign in and check the access available to your account; uploading a photo does not by itself guarantee generation access.
When your account has access and the image and settings are ready, select Generate Video. Wait for your result in My Videos, then watch the whole clip before deciding whether to keep it. Callout 3 marks the existing sample preview, which helps you understand the style before generating.
Review three areas:
- Face: Does the person remain recognizable, without the eyes or mouth changing shape?
- Hands and body: Do fingers, wrists, and shoulders stay coherent as the subject moves?
- Water and fabric: Do hair and clothing drift naturally, without sudden stretching or background warping?
Watch this underwater-effect example, then use the checklist above to review your own result.
Independent effect example supplied for this guide. The illustrative source portrait above was not its input.
A still frame cannot show temporal problems, so replay the beginning and ending as well. If the first result is awkward, change one thing at a time. Replacing a crowded photo with a cleaner portrait is easier to evaluate than changing the source, format, duration, and scene idea together.
Step 5: Download and Make a Short Edit
Use Download on the result you want to keep. In your usual video editor, trim to the strongest uninterrupted moment. Keep enough of the movement for viewers to understand the floating effect before the clip ends.
Gentle audio and a brief opening caption can support the mood. Avoid covering the face with large text. If you want a loop, compare the first and last frames; a hard change in pose may need a fade or a different trim.
Fix Common Portrait Problems
| Problem | What to Try Next |
|---|---|
| The face changes noticeably | Choose a sharper photo with fewer shadows or objects crossing the face. |
| Hands look distorted | Use a source with fully visible, separated hands, or a portrait that excludes them cleanly. |
| The body feels cramped | Leave more space around the subject and reconsider the output ratio. |
| The scene feels busy | Start with a simpler background and a clearer clothing silhouette. |
These are starting points for iteration, not guarantees. Keep the best version and compare new attempts against the specific issue you are trying to fix.
Ready to Make Your Underwater Clip?
Pick one clear portrait and one mood, then try the deep sea video creator. Start with a short clip, check the face and motion, and build your edit around the strongest few seconds.