How to Make a Photo from Emoji in SuperMaker
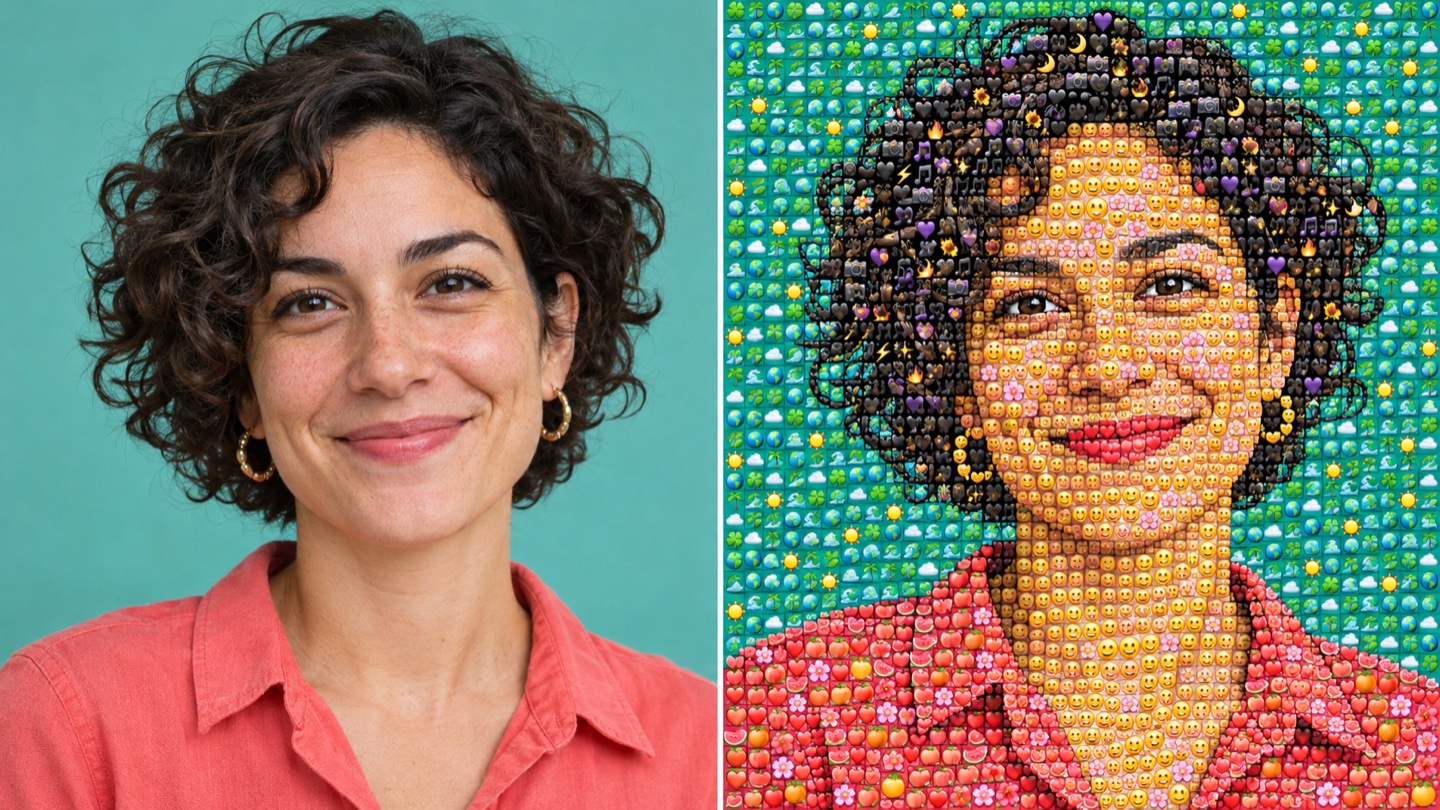
Create an emoji mosaic from your portrait, pet photo, or another clear image. This guide shows you how to choose a suitable photo, set the output shape and resolution, and review the result before downloading it for an avatar or social post.
What Is an Emoji Mosaic Photo?
An emoji mosaic photo is a picture formed from many small emoji tiles. At normal viewing size, their colors and shapes combine into a recognizable subject. Look closer and you can see the individual icons forming the face, clothing, objects, and background.
With our Photo From Emoji generator, you can give your own photo this mosaic look without arranging tiles by hand. Start with a clear subject and use the steps below to choose your output settings. In the illustration below, notice how small icons form both the balloon and its surroundings.
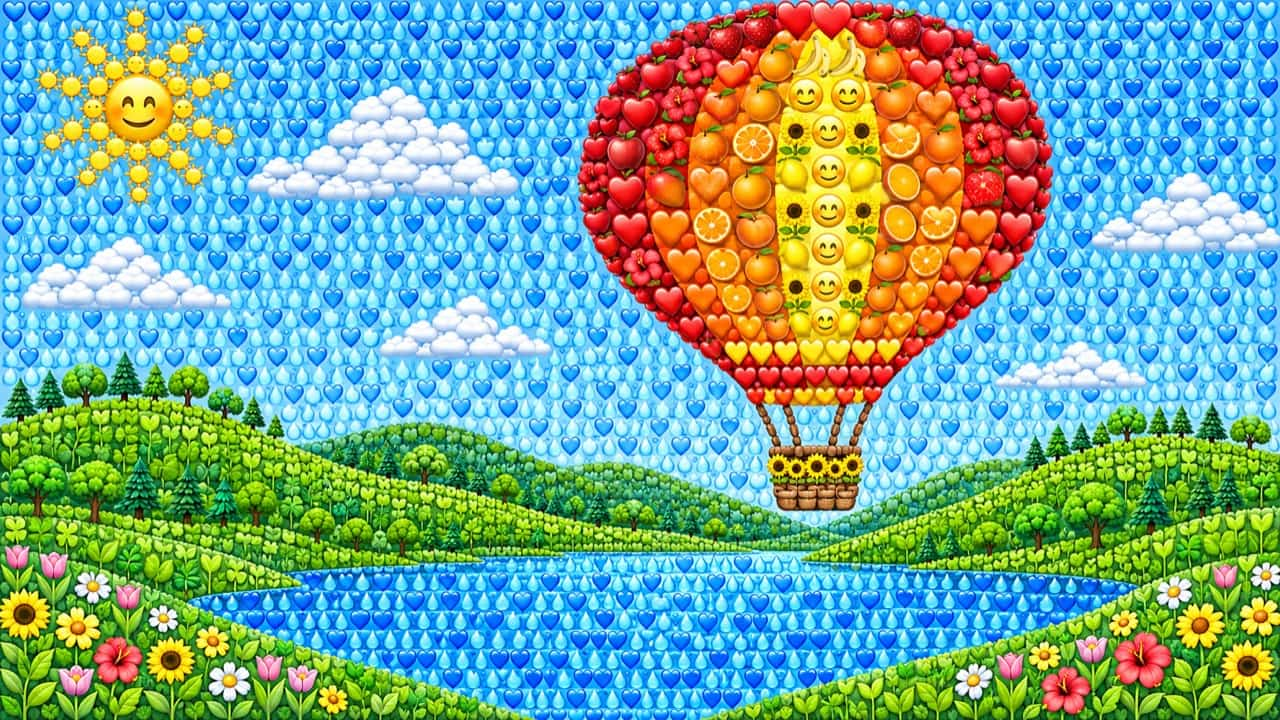
Mosaic illustration: warm-colored hearts and fruit form the balloon, while leaves and blue droplets build the landscape.
Choose a Photo That Will Stay Recognizable
Start with one main subject, even lighting, and a clear outline. For a portrait, choose a photograph where the eyes, mouth, and hairstyle are easy to distinguish. For a pet, look for separation between the fur and background. A golden dog against a pale yellow wall is a harder starting point than the same dog against green.
Crop before uploading if the subject is small. Keep enough space around ears, hair, or shoulders to avoid a cramped composition. Avoid screenshots with interface buttons, heavy beauty filters, and motion blur. These add distractions without helping the mosaic communicate the subject.
Create Your Emoji Art in Four Steps
1. Open the Tool and Upload One Image
Open the photo-to-emoji mosaic tool and find Upload Reference Image. Drag in one JPG or PNG, or click the upload area to select it; the displayed file limit is 10MB. Assets Library is another option if your picture is already stored there.
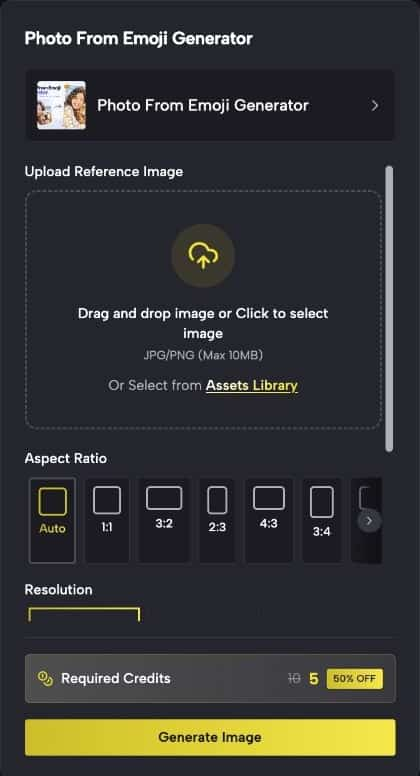
Upload your reference photo in this panel, then choose your output settings. Check the current Required Credits before generating.
2. Choose the Shape and Resolution
Use Aspect Ratio to choose the canvas shape. Start with Auto to follow the source composition, 1:1 for a square avatar, or 9:16 for a vertical layout. These are creative starting points; leave room for any later platform crop.
Choose an available Resolution option. Start with 1K to review the composition, then consider a higher supported setting for a larger final image. Use the options enabled for your selected aspect ratio.
3. Review the Remaining Settings and Generate
For a first attempt, leave Background on Auto and set Number of Images to 1. Review Public Visibility and Required Credits, then click Generate Image; complete sign-in if prompted. The tool also offers batches of up to four images when you want alternatives.
4. Inspect and Save the Result
When the image is ready, check it in My Images and download the version you prefer. Review it at the size you plan to share, then zoom in to inspect the emoji texture. Save the downloaded image rather than taking a screenshot of the preview.
Do I Need to Write a Prompt?
No. You can use this effect without writing or pasting a prompt. Upload your reference photo, choose the output settings, and select Generate Image.
Pick Settings for the Picture You Want
| Your Goal | Starting Point | What to Check |
|---|---|---|
| Profile picture | Close portrait, 1:1 | Face remains readable as a small thumbnail |
| Vertical social image | Portrait-oriented source, 9:16 | Head and important details have breathing room |
| Pet portrait | Clear eyes and contrasting background | Ears, muzzle, and fur outline stay distinct |
Change one thing at a time when comparing versions. Keeping the same source photo makes it easier to tell if a different shape or resolution helps. Increasing resolution alone is unlikely to solve weak framing or a subject lost in shadows.
Check the Mosaic at Two Viewing Distances
At normal size, ask if someone could identify the subject without seeing the original. Look at the outline, expression, and main color areas. If those disappear, the image may have attractive texture but a weak likeness.
Up close, look for varied, readable emoji details. A convincing mosaic balances the large picture with its smaller pieces. Check important areas such as eyes, a pet's nose, or the edge of a face against the background.
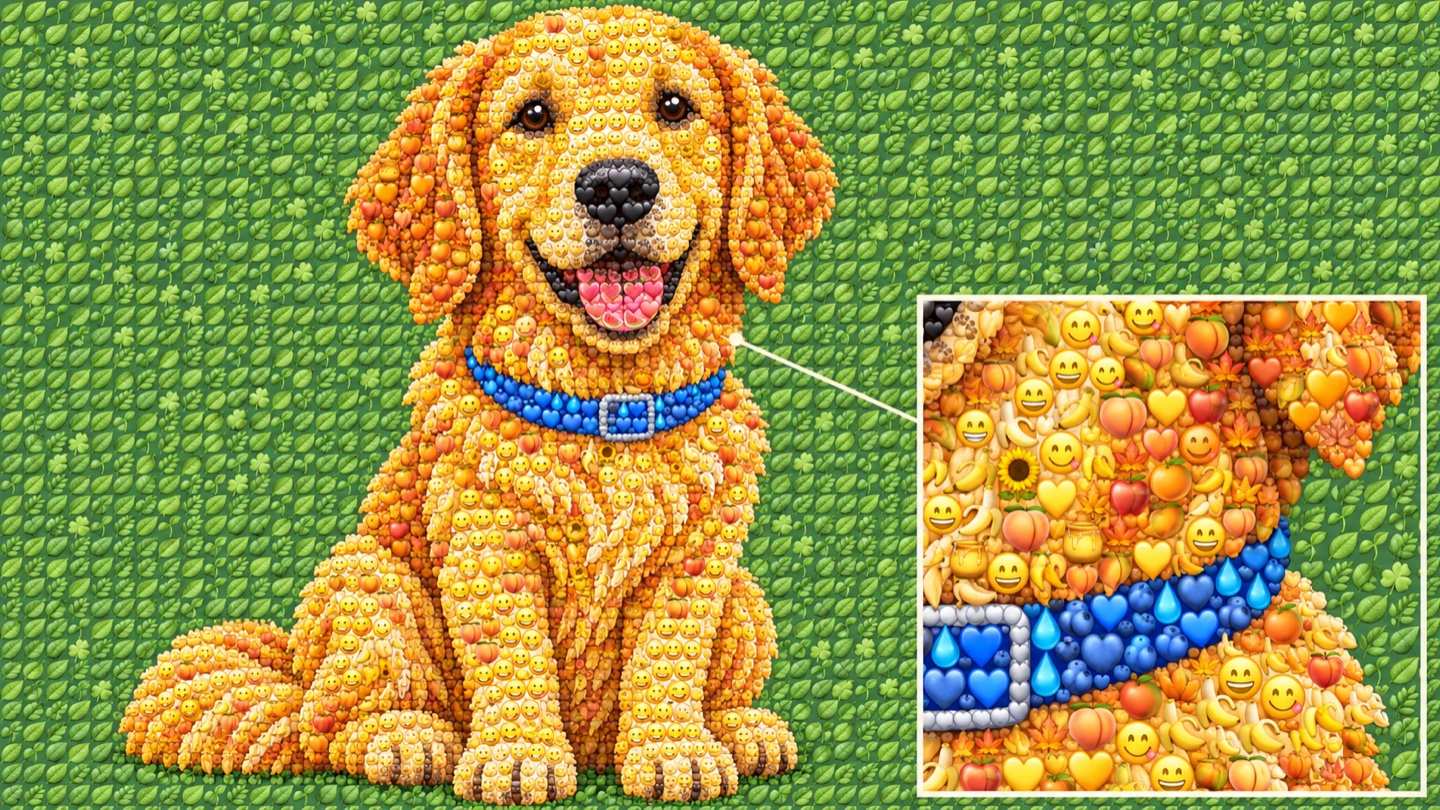
Pet illustration: the full view shows the dog's outline, while the enlarged area reveals the small icons that form its colors.
Fix Common Problems Before Trying Again
The face is difficult to recognize: Try a closer crop with more even light. A large group shot gives each face less space, so begin with a solo portrait.
The background competes with the subject: Choose a simpler source image or crop out unnecessary objects. Improve the starting composition before increasing output resolution.
The picture looks good enlarged but weak as an avatar: Test a small preview. Strong silhouettes and clear contrast matter more at thumbnail size than intricate texture.
The upload does not work: Check the file format and size. Convert unsupported files to JPG or PNG and keep them within the displayed 10MB limit.
Is Photo From Emoji Free to Try?
Yes. Sign up for SuperMaker to receive free credits and try Photo From Emoji. Before you generate, check your credit balance and the Required Credits shown for your chosen settings. Each generation uses credits.
Make Your First Emoji Mosaic
Ready to try it? Create your photo from emoji using a clear portrait or pet photo. Generate one version first, check how it looks at the size you plan to share, and download your favorite result.