How to Create a STORM II AI Video and Join the Crowd-Dance Trend
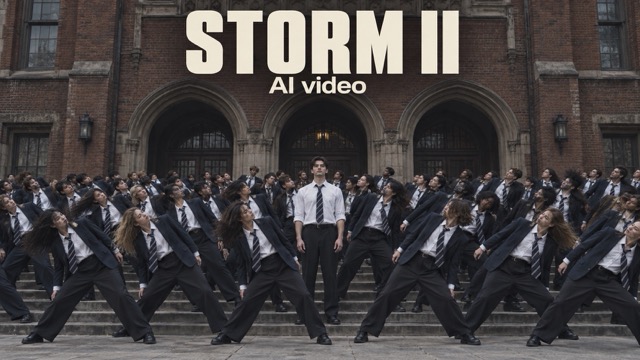
Put your own character at the center of the STORM II crowd-dance trend. This tutorial walks you through SuperMaker’s photo upload, video settings, and generation process, with practical tips for choosing a clear image, checking credits, and reviewing your clip before sharing it.
A familiar face, a perfectly timed crowd, and a scene that feels bigger than an ordinary selfie: that is the appeal of making your own STORM II AI video. You bring the character; the crowd-dance concept provides the visual hook.
The SuperMaker STORM II AI video generator starts with one main character photo. Upload it, choose your video settings, and select Generate Video. The current interface does not ask you to write a prompt or supply a reference dance clip.
This guide covers that dedicated workflow, from picking your picture to reviewing a result you want to share.
What Makes the STORM II Trend Recognizable?
The visual reference comes from the group choreography in GENER8ION’s official STORM video starring Yung Lean. In the crowd sequence, a composed central figure contrasts with densely arranged performers moving together.
That contrast gives the format its personality: individual stillness surrounded by collective movement. For your own interpretation, think about which face, outfit, or persona would make an interesting focal point. The aim is a recognizable character in a striking ensemble scene.
Before You Start: Choose One Clear Photo
Pick an image with one prominent person, a visible face, and even lighting. A half-body or full-body picture can provide useful clothing details, while a simple background keeps attention on the character. These are practical starting suggestions, not guarantees of a particular output.
Avoid blurry screenshots, crowded group photos, and heavy filters that obscure facial features. If two photos seem equally good, start with the one where you can recognize the person most easily at a small size.
How to Make a STORM II AI Video on SuperMaker
Step 1: Open the Dedicated Generator
Open the STORM II dance page on SuperMaker. Look for the Main character photo upload area near the top. This is the starting point for the effect.
Sign in if prompted. Keep your chosen image ready so you can move directly into the upload step.
Step 2: Upload Your Main Character
Add your photo through the upload area. The page also provides an Assets Library option if you already have an appropriate image available there.
Check that the uploaded picture contains the intended character. You do not need a photograph of the whole crowd to follow this workflow: the visible input asks for your main character photo.
A distinct outfit can make the concept feel more personal. Start with a picture you already like rather than spending time creating an elaborate reference before your first attempt.
Step 3: Pick a Format and Video Settings
Choose the aspect ratio, video length, resolution, and number of outputs available in the generator. For a straightforward first attempt, use this suggested setup:
| Setting | Suggested starting choice | Reason |
|---|---|---|
| Aspect ratio | 9:16 for a vertical post | Plan the framing around your intended presentation. |
| Alternative ratio | 16:9 for a landscape clip | Give the crowd a wider composition. |
| Video length | Start with the displayed 5-second option | Keep the first experiment focused. |
| Resolution | 720p | Begin with a preview you can assess before choosing another configuration. |
| Number of videos | 1 | Review one result before requesting more variations. |
These are editorial suggestions, not mandatory settings or a tested optimum. Check the controls currently available on the page, and review the credit estimate after making your choices.
Step 4: Generate Your Clip
Click Generate Video when the photo and settings are ready. Allow processing to finish, then look for the result in My Videos.
The quick part is getting started: you are working through an upload-and-settings flow rather than constructing a manual animation sequence. Generation time can vary, so there is no fixed completion-time promise.
Step 5: Review the Character and Crowd
Watch the whole clip before deciding to use it. Start with the face: does it remain recognizable? Then inspect the hands, clothing, body movement, and surrounding formation.
Finally, consider the overall composition. Your lead should be easy to notice, while the crowd contributes to the effect instead of distracting from it. SuperMaker’s official FAQ notes that results can vary with the source photo, model, settings, and generation.
If you want another version, change one thing at a time. Try a clearer source image first, or adjust the framing while keeping the same photo.
STORM II AI Video Credits: Check Before Generating
As of September 17, 2026, the generator displays a Required Credits estimate alongside its creation controls. Read that live amount for your selected configuration before generating.
Do not assume a promotional figure or an earlier attempt’s cost applies to every setup. Starting with one output also gives you a chance to evaluate the concept before committing to more variations.
This tutorial verifies the public interface; it does not report a paid generation test or measured output quality.
Turn Your Result Into a Trend Post
Choose a moment that makes the character-and-crowd relationship immediately clear. Keep any caption short enough to leave the visual room to work. For example: “One photo. My main-character moment.”
For a vertical post, inspect whether the framing keeps the lead visible during movement. For a landscape post, look at how the group fills the wider scene. Let the finished clip guide your presentation rather than adding layers of text that compete with the choreography.
Join the STORM II Trend with Your Own Character
You do not need to film a routine to start this workflow. Choose a clear photo, select your video parameters, and review your generated interpretation.
Create your STORM II AI video on SuperMaker and see how your character fits the crowd-dance concept.